To install a Sentek Drill & Drop soil probe, you will need:
- a powerful drill
- example from Dewalt
- example from Milwaukee Tool
- a Sentek tapered auger corresponding to the length of your probe
- a Sentek installation tripod
- a Sentek extractor (in case you must remove a partially-installed probe)
- a bucket with the bottom removed
- 100 liters (20 gallons) of water
Before going to the field to install, view the Sentek Drill & Drop installation video and the attached Drill & Drop install guide.
Field Saturation
After installing the probe, apply the water slowly to the top of the probe and the soil immediately around it. Saturate the soil column around the probe. Doing so will confirm that your probe is making the proper contact with the soil and will also allow for the eventual determination of the soil field capacity.
The recommended way to ensure that the soil column around your moisture probe is fully saturated is to install a bottomless bucket around your probe to concentrate the flow of the water that you apply.
Steps:
- After installation of the probe, cover the surrounding area with an empty bucket
- Apply water to the area and allow time for penetration into the soil profile. This can take several hours.
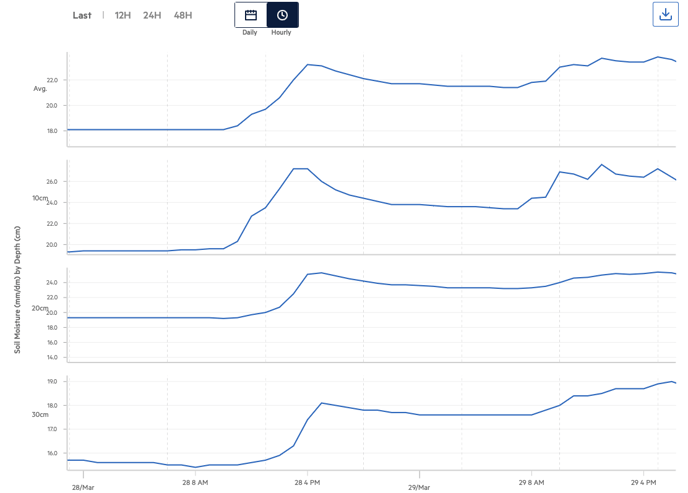
- Observe path flow in Arable Web App under Analysis > Graph > Soil Moisture.
Removal
To remove a Sentek Drill & Drop probe from the soil, you will need an extractor. Before going to the field to remove a probe, view the removal portion of the Sentek how-to video.
Arable offers the auger, tripod and extractor kit for rent in North America and Europe. We can also connect you with a local installer. Contact us at support@arable.com for details.